

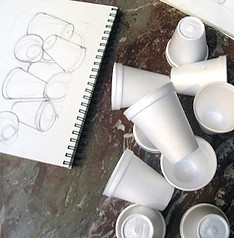
"Styrofoam Cup Sketching"
This artist is showing a very symbolic way to draw a cup.
* How would this drawing of a cup change if the artist's viewpoint were higher?
*What about lower?

At eye level the ellipse seems to be a straight line.
Notice how much you see of the opening circle depending upon the viewpoint.
Expect that circles will change into ellipses as our view point changes.
When we look directly down into a cup the opening appears more circular
Styrofoam Cup Charcoal Drawing Still Life
This lesson plan was written by Michelle C. East © 2017, Inspired by DC Sketchers: The Perception of Spaces & Relationships- via Styrofoam Cups
Students will learn basic compositional skills as well as drawing observational skills with this Styrofoam still life drawing.
-
Students will learn the observational drawing technique of observing the “Degrees of Curvature” of line.
-
Students will learn to draw lines, circles and ellipses by using fluid sketch motions
-
Students will apply knowledge of ellipses, point of view, and angles of line and apply it to a small still life drawing.
-
Students will learn value techniques and render the drawings with preliminary shading.

Delivery:
Degrees of Curvature: observing how much a line curves. Observe how the curvature of a line changes with your point of view of an object. Notice how the ellipses as well as the bottom lines on the cups change as the point of view changes.
Heading 3
Drawing Curved Lines & Ellipses:
Step # 1: Practice
On the back of your sketch paper practice creating free, flowing, light sketch lines. Keep your movements free & loose.
* Begin making a circle-go round & round until you get it right. Remember to draw lightly!
* After you have a good circle begin making a series of ellipses beginning almost the size of a circle and progressively squashing to become thinner.
Notice how circles change into ellipses when our point of view of the object changes. If we look directly down at a cylinder, like a cup, we will see a full circle. As we lower our position to one side, the opening becomes more & more of an ellipse until we cannot see inside the cylinder any longer. At eye level, the ellipse appears to be a straight line.


Quick sketch:
To draw a cylinder, start with center line or axis. Then draw the ellipse at the right angles to the center line. Draw side diagonal lines connecting the edges of the ellipse down toward the bottom so they are equal distance from the axis line. Turn your paper if it makes it easier to draw the straight lines. Finally add a curved line at the bottom.
(You can watch the video above to help with your sketch.)


A
B
C

C
B
A
View from above:
Notice the space from A to B verses the space from B to C.
B to C fits 3 1/2 times into A to B.
Changing the view point changes the measurement:
Here A to B is ALMOST the same as from B to C
Final Sketch:
Draw 1 value drawing from observation of a cup.
* Arrange the cup in front of you
* Decide where your head will be in relation to the cup then snap a photo from that viewpoint with your phone.
* Taking into account what you have learned above, sketch the cup using light, contour sketch lines.
* Create a full value drawing of your cup showing background and cast shadows
Turning in the assignment assignment:
Making sure to take photos shooting from above, cropping without glare take a photo of each of the below and attach it to your google assignment titled "Styrofoam Cup Sketch":
1. Your sketch paper of ellipses
2. A quick sketch of a cup
3. A photo of your full value cup